
Photo journals are the perfect gift for a teen, as a mothers day gift, and gifts for friends. We are going to walk through creating this DIY photo journal cover in 9 easy steps!
Read on to see how easy it is to create these for yourself and for gifts!
- Skill level: Beginner
- Fabric: 5/8 yard, fat quarter friendly pattern (If the fabric has 43 1/2 inches of useable width you could use as little as 1/3 of a yard)
- Photo Fabric Blocks needed: 5×7 inch photo quilt block
- Tools and supplies needed: ruler, marking pen, sewing machine, pins, thread, interfacing

Step 1: Print your photo on a 5×7 inch block with 1/4 inch seams allowances on every side.
My preferred way is to order a fat quarter of 5×7 photos from Photo Quilt Blocks online. This way you can make a bunch of gifts at once. You will get NINE of the 5×7 photos on one fat quarter. That makes each photo $3.88 without you having to remember how to do it yourself, figure out how to DIY print photos on fabric, or having to acquire all the equipment to do it yourself!
So go ahead, look through your photos and get those ready to go and ordered!
To learn how to order them online yourself, you can take a look at this little video tutorial that walks you through the process! It is easy peasy!
Step 2: Audition Fabric with your photo to make sure you get the best fit for your photo.
What does it mean to audition fabric for a project? Well, quite simply, it means we are trying out fabrics with our photo to see which one makes our photo shine! Take a look at the fabrics I auditioned to see which one I liked best:
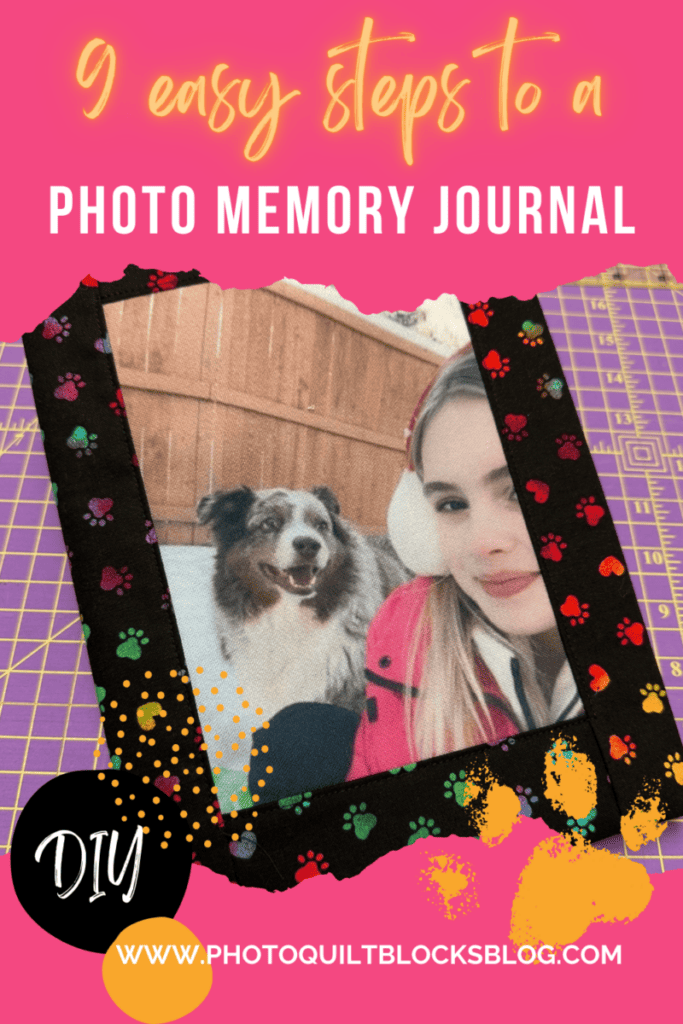
After looking at the two fabrics, I decided that the fabric on the far LEFT grabbed the colors of her jacket and made both the girl and the pup pop, so I chose the rainbow pawprint!

Step 3: Cut out your pattern pieces.
This journal cover fits the composition notebooks that just about everyone carries. In case you don’t have them in your area, here is a link to the correct size journal!
The measurements are approximately 10 x 7 1/2.

You are going to need 5/8 of a yard for this Photo Memory Journal. ***If your fabric has 43 1/2 inches of useable width, you can get buy with 1/3 of a yard.

If you choose to use fat quarters you have lying around, this pattern is fat quarter friendly (a fat quarter is approximately 18×22 inches).
Make sure to note which pieces need interfacing. I used Pellon Sheerweight interfacing. You can get Pellon Sheerweight Interfacing here in my store, or on Amazon here!

Step 4: Layout your pieces to sew together and start piecing!

We are going to sew the two short pieces to the top and bottom of the photo block first.
Press the seams toward the fabric and away from the photo block. Make sure to cover your photo with a piece of cotton to protect it when ironing!

Sew the long narrow strip on to the side of the photo next!

Sew the large side piece to the side of the photo.

Step 5: Topstitch around the photo block.

Step 6: Prepare the inner flaps for the journal.
Press the flaps in half the long way for a measurement of 4x 10 3/4.

Step 7: Sew the outer journal, flaps, and lining together.
FIRST – Lay the two flaps on top of the front of the journal as shown.

SECOND – Layer the large 16×10 3/4 inch piece over the journal front and the flaps as shown.

THIRD – Sew around the edges leaving an opening to turn the journal right side out.

Step 7: Turn journal right side out and press.

Step 8: Press under the opening and stitch the opening shut.
Do not stitch all the way around the journal. If you do, it will be too small and not fit correctly.

Step 9: Insert journal into the journal cover.

Just a little Blog Note:
Welcome to my blog, where I strive to provide valuable content and recommendations. As a transparency measure, I want to disclose that I utilize Amazon affiliate links on this platform. These links contribute to the maintenance and enhancement of this blog, ensuring continued quality content for readers like you. Thank you for your support and happy exploring!
Recent Posts
Hey there, fellow sewing enthusiasts and embroidery aficionados! Are you ready to take your quilting game to the next level with your Brother Luminaire embroidery machine? Well, you're in for a treat...
Photo Baby Teething and Snuggle blanket that is quick and easy? Yes, PLEASE! Get ready for a whirlwind of creativity! Brace yourself for the ultimate DIY delight — a project that's not just...